
To set up Home Assistant on your Raspberry Pi, start by flashing the Home Assistant OS image onto a microSD card using tools like balenaEtcher or Raspberry Pi Imager. Insert the card into your Pi, power it on, and connect via Ethernet or Wi-Fi. Access the web interface at “http://homeassistant.local:8123,” then follow the prompts to create an account and configure your devices. Keep exploring to discover how to customize and automate your smart home further.
Key Takeaways
- Download the latest Home Assistant OS image and flash it onto a microSD card using balenaEtcher or Raspberry Pi Imager.
- Insert the flashed microSD card into the Raspberry Pi and power it on, connecting via Ethernet or Wi-Fi.
- Access the Home Assistant web interface by navigating to “http://homeassistant.local:8123” or the device’s IP address.
- Complete the initial setup by creating a user account, configuring preferences, and updating the system for security.
- Customize dashboards, integrate smart devices, and set up automations to create your open-source smart home hub.

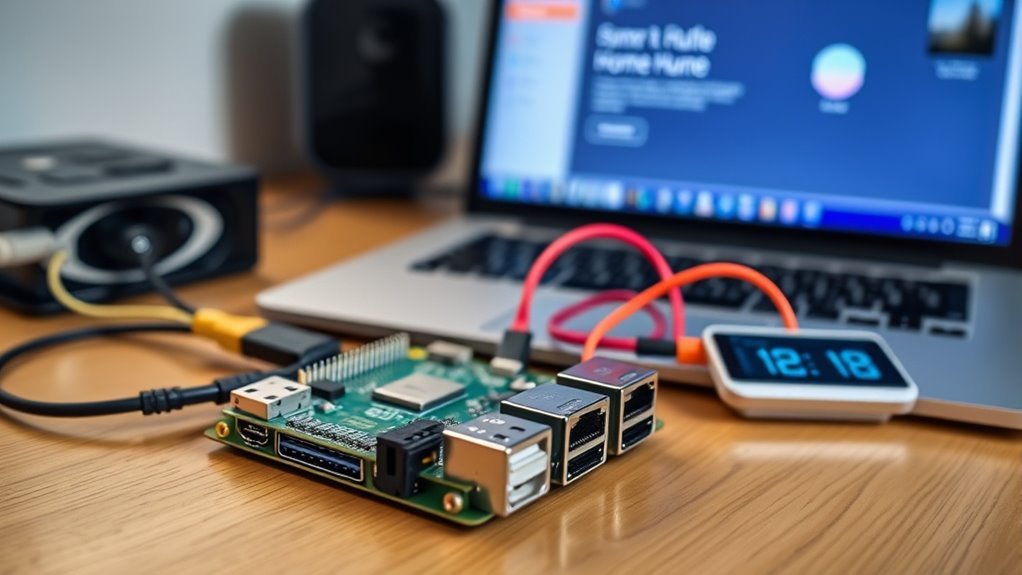
Setting up Home Assistant on a Raspberry Pi is a straightforward way to create a powerful, customizable smart home hub. Whether you’re new to home automation or have some experience, this process is manageable and rewarding. First, you need to choose the right Raspberry Pi model. Most users opt for the Raspberry Pi 4 or Raspberry Pi 3, as they provide enough processing power and memory to run Home Assistant smoothly. Before starting, gather your essentials: a microSD card (at least 32GB recommended), a power supply, an Ethernet cable or Wi-Fi connection, and a computer to prepare the installation.
Once you have everything, you’ll want to download the Home Assistant OS image from the official website. The OS is optimized specifically for running Home Assistant and simplifies the setup process. To write this image onto your microSD card, use a reliable tool like balenaEtcher or Raspberry Pi Imager. Insert your microSD card into your computer, launch the flashing tool, select the Home Assistant image, and follow the prompts to complete the process. After flashing, eject the microSD card and insert it into your Raspberry Pi.
Download the Home Assistant OS image and flash it using balenaEtcher or Raspberry Pi Imager.
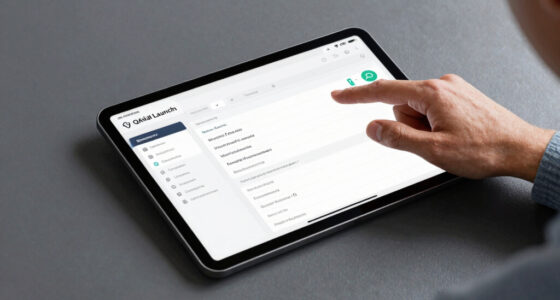
Next, power up the Raspberry Pi by plugging in the power supply. Connect it to your network via Ethernet for a more stable connection, or use Wi-Fi if necessary. Booting up may take several minutes, during which the system initializes. You can monitor the progress by connecting to the device’s IP address through your router or using network scanning tools. Once the Raspberry Pi finishes booting, open a web browser on your computer and navigate to “http://homeassistant.local:8123” or type in your Raspberry Pi’s IP address followed by “:8123”.
The web interface will guide you through the initial setup. You’ll create a user account, set your location, and configure basic preferences. Home Assistant will start discovering connected devices on your network automatically, and you can begin integrating smart lights, switches, sensors, and more. During setup, it’s a good idea to change default passwords and update the system to guarantee security and stability. The interface is intuitive, and you can customize dashboards, automate routines, and add integrations as you go. Additionally, exploring local automation options can enhance responsiveness and privacy in your smart home setup.

STEADYGAMER – 32GB Raspberry Pi Preloaded Pi OS Micro SD Card | 5, 400, 4, 3B+, 3A+, 3B, 2, Zero | Compatible with All Pi Models | Desktop (32GB)
Genuine 32GB Class 10 Micro SD Card Preloaded w/ Latest Version of Raspberry Pi OS Desktop
As an affiliate, we earn on qualifying purchases.
As an affiliate, we earn on qualifying purchases.
Frequently Asked Questions
Can I Install Home Assistant Without an Internet Connection?
Yes, you can install Home Assistant without an internet connection, but you’ll need to prepare everything beforehand. Download the necessary image and dependencies on another device with internet access, then transfer them to your Raspberry Pi via USB or SD card. Keep in mind, initial setup and updates require internet access, so you’ll need to connect periodically. Once installed, you can operate many features offline, but some integrations may need online connectivity.
What Are the System Requirements for Raspberry Pi?
You need a Raspberry Pi 3 or newer with at least 2GB of RAM to run Home Assistant smoothly. A microSD card of 32GB or more guarantees enough storage for your data and updates. Power supply should provide 2.5A or higher, and a reliable internet connection is recommended, especially if you plan to integrate remote devices. Keep in mind, newer models like the Raspberry Pi 4 offer better performance and future-proofing.
How Do I Update Home Assistant After Installation?
To update Home Assistant, first open your Raspberry Pi’s terminal or SSH into it. Run the command `ha core update` to update the core, or use `ha supervisor update` for supervisor updates. If you’re using the Home Assistant OS, you can also update through the web interface by moving through the Supervisor tab and clicking on “System,” then “Update.” Make sure your device is connected to the internet during this process.
Is There a Mobile App for Managing Home Assistant?
Yes, you can manage Home Assistant with a mobile app, making it easy to control your smart home on the go. You simply download the Home Assistant app from the App Store or Google Play, then connect it to your setup. This app provides an intuitive interface for all your devices, automations, and settings, so you stay connected and in control no matter where you are.
Can I Run Multiple Smart Home Platforms on One Raspberry Pi?
Yes, you can run multiple smart home platforms on one Raspberry Pi. You simply need to install each platform in separate containers or virtual environments to prevent conflicts. Tools like Docker make this process easier, allowing you to manage different systems efficiently. Keep in mind that your Raspberry Pi’s resources are limited, so choose lightweight platforms and monitor performance regularly to ensure everything runs smoothly.

Home Assistant Green | Smart Home hub with Advanced Automation | Official Home Assistant Hardware
💡 EASIEST WAY TO GET STARTED WITH HOME ASSISTANT – With Home Assistant already installed, it only requires…
As an affiliate, we earn on qualifying purchases.
As an affiliate, we earn on qualifying purchases.
Conclusion
Once you’ve set up Home Assistant on your Raspberry Pi, you’re ready to transform your home into a smarter space. Remember, a journey of a thousand miles begins with a single step, so don’t wait to start customizing your smart hub. With patience and curiosity, you’ll unseal endless possibilities to automate and monitor your home effortlessly. Embrace the process, and soon you’ll enjoy the comfort and convenience of your very own open-source smart hub.
![[UL Listed] iUniker Raspberry Pi Power Supply with Switch 15W 5V 3A Micro USB Raspberry Pi 3 b+ Power Switch (UL Listed)](https://m.media-amazon.com/images/I/41lYLFAVkjL._SL500_.jpg)
[UL Listed] iUniker Raspberry Pi Power Supply with Switch 15W 5V 3A Micro USB Raspberry Pi 3 b+ Power Switch (UL Listed)
Compatible only with the Raspberry Pi 2, Pi 3 and Pi 3 B+. NOT Compatible with Raspberry Pi…
As an affiliate, we earn on qualifying purchases.
As an affiliate, we earn on qualifying purchases.
UGREEN Cat 8 Ethernet Cable 6FT, High Speed Braided 40Gbps 2000Mhz Network Cord Cat8 RJ45 Shielded Indoor Heavy Duty LAN Cables Compatible with Gaming PC PS5 PS4 PS3 Xbox Modem Router 6FT
40 Gbps 2000 Mhz High Speed: The Cat 8 ethernet cable support max. 40 Gbps data transfer and…
As an affiliate, we earn on qualifying purchases.
As an affiliate, we earn on qualifying purchases.