To build your own JARVIS-style AI assistant with a Raspberry Pi, start by setting up the hardware with a microphone, speaker, and Raspberry Pi running Raspberry Pi OS. Install open-source voice recognition tools like PocketSphinx, and connect them with speech synthesis engines such as eSpeak. Use Python scripts to handle commands like weather updates or music control, and customize the system to add features. Keep exploring, and you’ll uncover more ways to enhance your smart assistant.
Key Takeaways
- Set up Raspberry Pi with Raspberry Pi OS, install voice recognition tools like PocketSphinx or SpeechRecognition API.
- Integrate natural language processing libraries such as Rasa or Dialogflow for understanding commands.
- Connect speech-to-text and text-to-speech modules (e.g., eSpeak, Google TTS) for seamless voice interaction.
- Develop Python scripts to handle commands for music, weather, reminders, and integrate relevant APIs for advanced features.
- Customize responses, add personality, and optionally connect to display or other peripherals for a personalized JARVIS-like experience.

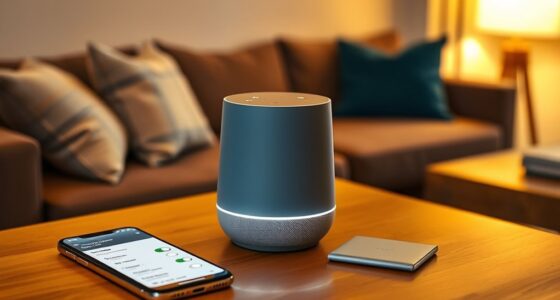
Creating your own AI assistant with a Raspberry Pi is an achievable and rewarding project that combines hardware tinkering with software development. You’ll transform a small, affordable computer into a personalized digital assistant capable of understanding voice commands, controlling smart devices, and performing various tasks. The process begins with gathering your components: a Raspberry Pi (preferably the latest model for better performance), a microphone, a speaker, and necessary peripherals like a power supply and SD card. Once you have everything, you can set up your Raspberry Pi by installing an operating system such as Raspberry Pi OS, which provides a stable foundation for your project.
Next, you’ll focus on installing the essential software. To give your assistant voice recognition capabilities, you can use open-source tools like PocketSphinx or Google’s Speech Recognition API. These tools allow your Raspberry Pi to listen to your commands and convert speech into text. For natural language processing, libraries like Rasa or Dialogflow help your assistant understand context and respond appropriately. You’ll also want to install a text-to-speech engine, such as eSpeak or Google Text-to-Speech, so your assistant can reply with spoken responses. Setting up a simple server or script to manage these components guarantees smooth interaction between voice input and output.
Once your software environment is ready, you can start scripting the core functionalities. Use Python, a versatile programming language, to connect your voice recognition and synthesis modules. Write small scripts to handle basic commands like playing music, checking the weather, or setting reminders. As you gain confidence, you can expand your assistant’s capabilities by integrating APIs for more complex services—like controlling smart home devices or fetching news updates. This stage involves some experimentation; testing your commands, debugging, and gradually adding features will help refine your assistant’s performance.
Throughout this process, customization is key. You can give your assistant a unique personality by modifying its responses, choosing a name, or even adding visual elements if you connect a display. The Raspberry Pi’s flexibility allows you to embed your AI assistant into a dedicated device—perhaps a tabletop unit, a wall-mounted panel, or a portable gadget. Understanding the hardware is crucial to ensure your project runs smoothly and efficiently. The sense of achievement comes from seeing your code come to life in a functional, interactive system you built yourself. This project not only deepens your understanding of AI and hardware integration but also results in a practical and personalized assistant that can make daily tasks easier and more enjoyable.

USB Sound Card with 8Ω 5W Speaker for Raspberry Pi/Jetson Nano, USB to Audio Adapter Support Recording and Playback, Stereo Codec Onboard Microphone and Speaker Header, Driver-Free, Plug and Play
This is a USB sound card/USB audio module with 8Ω 5W Speaker that supports recording and playback, a…
As an affiliate, we earn on qualifying purchases.
As an affiliate, we earn on qualifying purchases.
Frequently Asked Questions
Can I Upgrade JARVIS With New Features Later?
Yes, you can upgrade your JARVIS with new features later. Since it’s built on customizable software, you just need to update or add modules to enhance its capabilities. You can install new plugins, improve existing functions, or integrate additional hardware. Regular updates keep your assistant current and more efficient. Just make sure to back up your system before making major changes, and follow tutorials for smooth upgrades.
What Are the Hardware Requirements for the Project?
You’ll need a Raspberry Pi (preferably a 3 or 4 model), a microSD card with at least 16GB storage, and a power supply. A microphone and speaker are essential for voice interaction, and a USB camera can enhance visual recognition. You might also want Wi-Fi or Ethernet connectivity, plus optional components like a display or sensors for added features. Make sure your hardware matches your project’s scope and future upgrade plans.
How Secure Is My Data With This AI System?
Your data security depends on how you set up and configure your AI system. If you implement strong passwords, keep your software updated, and use encryption, your data stays protected. However, since it’s a DIY project, you’re responsible for maintaining security. Regularly monitor your system, restrict access, and back up data. While it’s not as foolproof as commercial solutions, careful setup markedly reduces risks.
Is Internet Access Necessary for JARVIS to Function?
No, internet access isn’t strictly necessary for JARVIS to function. If you set up the AI locally on your Raspberry Pi, it can operate offline, handling commands and tasks without needing a connection. However, for features like cloud-based updates, voice recognition, or accessing online data, internet access becomes essential. You can customize your setup based on your needs, balancing offline functionality and online capabilities.
Can I Customize Voice Commands for Specific Tasks?
Yes, you can customize voice commands for specific tasks. Imagine painting broad strokes over a canvas, allowing you to craft unique instructions that your AI understands perfectly. You’ll find that with some simple tweaks, your JARVIS can recognize personalized phrases, making interactions feel more natural and tailored. This flexibility transforms your assistant into a true reflection of your needs, turning routine commands into a seamless, intuitive experience you control effortlessly.
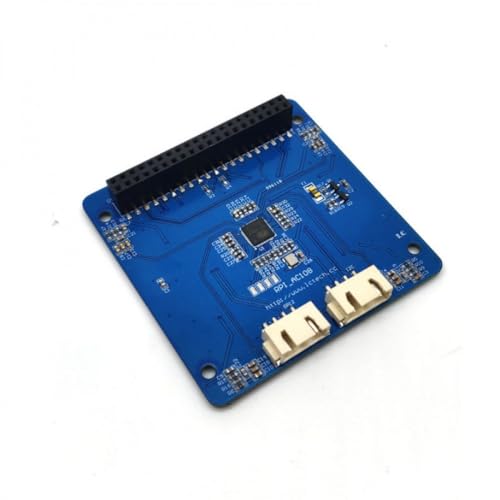
ReSpeaker Voice Recognition Module for Raspberry Pi AC108 Audio Decoder 4-Microphone Array APA102 LED I2S/I2C fit Pi Zero/2B/3B+
The module is equipped with the audio decoding chip from X-POWER Company and a 4-channel silicon microphone array.
As an affiliate, we earn on qualifying purchases.
As an affiliate, we earn on qualifying purchases.
Conclusion
Now that you’ve built your own AI assistant with a Raspberry Pi, you’re ready to explore endless possibilities. Remember, Rome wasn’t built in a day—patience and persistence are key. Keep experimenting, tweaking, and learning, and your project will only get better. With dedication, your DIY JARVIS can become an invaluable part of your daily life. Stay curious, because every great journey begins with a single step.

Programming the Raspberry Pi, Second Edition: Getting Started with Python
As an affiliate, we earn on qualifying purchases.
As an affiliate, we earn on qualifying purchases.

Your Raspberry Pi Smart Home: Setting up your Smart Home with Home Assistant – Affordable and Manufacturer Independent
As an affiliate, we earn on qualifying purchases.
As an affiliate, we earn on qualifying purchases.