
To set up virtual no-go zones for your robot vacuum, start by checking if your model supports zone mapping through its app or control panel. Confirm your device is compatible and firmware is up to date. Use the app to create a map of your space, then draw or mark boundaries around delicate or restricted areas. Test the zones to make sure they’re respected, and regularly adjust them as your home changes. Keep exploring for detailed tips and troubleshooting steps.
Key Takeaways
- Verify your robot vacuum’s compatibility and ensure firmware and app are up to date for zone features.
- Use the app to create an accurate map by running a full cleaning cycle and marking obstacles.
- Draw virtual no-go zones directly on the map, carefully outlining sensitive or restricted areas.
- Test the zones by running a cleaning cycle to confirm boundaries are respected, adjusting as needed.
- Regularly review and update no-go zones to accommodate home layout changes and maintain optimal navigation.
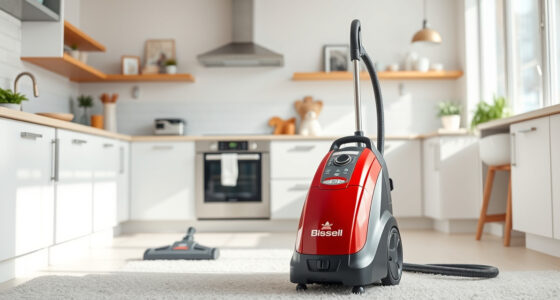
uninell Robot Vacuum and Mop with Self-Emptying Station, 7000Pa Suction for Pet Hair on Carpets, LiDAR Navigation Creates No-Go Zones, Quiet, Works with Alexa, for Hardwood Floors & Multi-Floor Homes
【90 Days of Pet Hair Hassle-Free & No More Tangles】 Tired of emptying your robot daily and dealing…
As an affiliate, we earn on qualifying purchases.
As an affiliate, we earn on qualifying purchases.
Understanding Virtual No-Go Zones and Their Benefits

Virtual no-go zones are digital boundaries you can set to prevent your robot vacuum from entering certain areas. These zones act like a virtual fence, guiding your vacuum away from specific spots without physical barriers. By creating these zones, you improve obstacle avoidance, reducing the chances of your vacuum bumping into delicate furniture or restricted spaces. This setup ensures more efficient cleaning, saving you time and effort. Virtual no-go zones also help protect fragile items or cords that could be tangled or damaged. They give you control over where your robot can and can’t go, making cleaning more tailored to your home’s needs. Implementing digital boundary settings can also optimize your robot’s navigation by integrating with its mapping system, especially when combined with navigation and mapping explainers. Additionally, understanding how contrast ratio and other image quality factors influence display performance can help in various home tech setups, including smart cleaning devices. Properly configuring these zones enhances the robot’s efficiency, ensuring thorough cleaning without unnecessary interruptions.

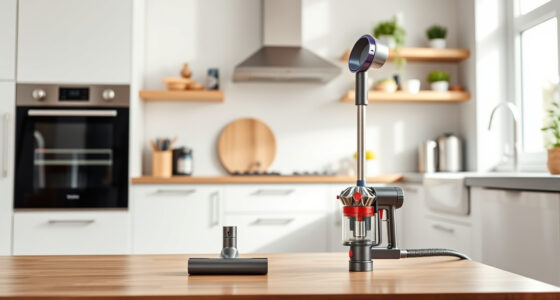
MONSGA Robot Vacuum and Mop Combo, 90 Days Self-Emptying with 8000Pa Suction, LiDAR Smart Mapping, Dual Anti-Tangle for Pet Hair, Carpet and Hard Floor
8000Pa Max Suction Meets Dual Anti-Tangle Design: From scattered crumbs to fluffy pet fur, this robot vacuum handles…
As an affiliate, we earn on qualifying purchases.
As an affiliate, we earn on qualifying purchases.
Checking Compatibility With Your Robot Vacuum Model

Before setting up virtual no-go zones, make sure your robot vacuum supports the features you need. Check if your model requires specific app or firmware updates to enable zone configuration. Also, verify whether physical zones are compatible with your vacuum’s mapping capabilities. Additionally, consider the net worth estimate of your robot vacuum brand to assess its advanced features and reliability. To ensure optimal performance, review your device’s software compatibility and update options as recommended by the manufacturer. Being aware of the industry trends can also help you choose the most effective zone setup options for your device. Understanding the technology specifications of your vacuum can further ensure seamless integration of virtual zones with your existing home setup. Paying attention to compatibility standards can help prevent potential conflicts with other smart home devices and improve overall functionality.
Model Compatibility Requirements
Wondering whether your robot vacuum can handle virtual no-go zones? First, check your model’s compatibility list provided by the manufacturer. Not all models support this feature, so verifying compatibility is vital. Make sure your vacuum’s firmware is up to date, as older versions may lack the necessary capabilities. Some models require specific firmware versions to enable virtual boundaries. If your device isn’t on the compatibility list or runs outdated firmware, you might not be able to set up virtual no-go zones. Confirming these details beforehand saves time and prevents frustration. Remember, the ability to create virtual boundaries depends on both hardware and software features, so double-check your model’s specifications before proceeding. Understanding firmware requirements is essential for ensuring your device can support advanced features like virtual zones. Additionally, consulting the manufacturer’s support resources can provide helpful guidance on compatibility and firmware updates. Regularly checking for software updates can ensure your device remains compatible with the latest features and improvements. Being aware of firmware compatibility can help you avoid potential issues during setup.
App and Firmware Updates
Ensuring your robot vacuum is compatible with virtual no-go zones starts with checking for the latest app and firmware updates. Updated firmware can improve Wi Fi connectivity, guaranteeing your device maintains a stable connection, which is essential for zone management. Also, app updates often include new features that enhance zone setup and control, making it easier to customize your no-go zones. Before updating, verify your vacuum’s battery health; a healthy battery ensures smooth updates without interruptions. Outdated firmware or app versions might cause compatibility issues, preventing you from creating or modifying no-go zones effectively. Regularly checking for updates guarantees your vacuum operates at peak performance, maintains strong Wi Fi connectivity, and supports all the latest zone features, providing a seamless and efficient cleaning experience.
Physical Zone Compatibility
Checking if your robot vacuum supports virtual no-go zones is essential because not all models have the same capabilities. Some vacuums can create custom zones, while others can’t. To guarantee compatibility, consider these factors:
- Whether your model allows zone mapping through the app
- Support for pet allergies by avoiding sensitive areas
- Ability to set up cleaning schedules around zones
- Sensor types that detect boundaries or obstacles
- Firmware updates that enable zone features
- Understanding energetic alignment can help you optimize your vacuum’s performance and ensure it functions effectively within your desired zones. Additionally, reviewing your vacuum’s compatibility with smart home devices can enhance zone management and integration with other automation systems. Verifying your device’s software capabilities ensures you can utilize advanced features like virtual no-go zones fully. Recognizing the zone mapping technology used by your vacuum can also aid in troubleshooting and maximizing its efficiency. Being aware of the upgradability options allows you to enhance your vacuum’s features over time and stay current with new virtual zone functionalities.
Knowing your vacuum’s physical zone capabilities helps you effectively block off areas like pet allergy-prone zones or delicate rugs. Confirming compatibility prevents frustration and ensures your virtual no-go zones work seamlessly with your cleaning routines.

Nispira Magnetic Boundary Tape – Marker Strips for Robotic Vacuums Compatible with Neato Robot Vacuums Boundary Marker Strip Belt (1 Roll)
Creates No-Go Zones – Only compatible with Neato robotic vacuums. Prevents your robot from entering restricted areas such…
As an affiliate, we earn on qualifying purchases.
As an affiliate, we earn on qualifying purchases.
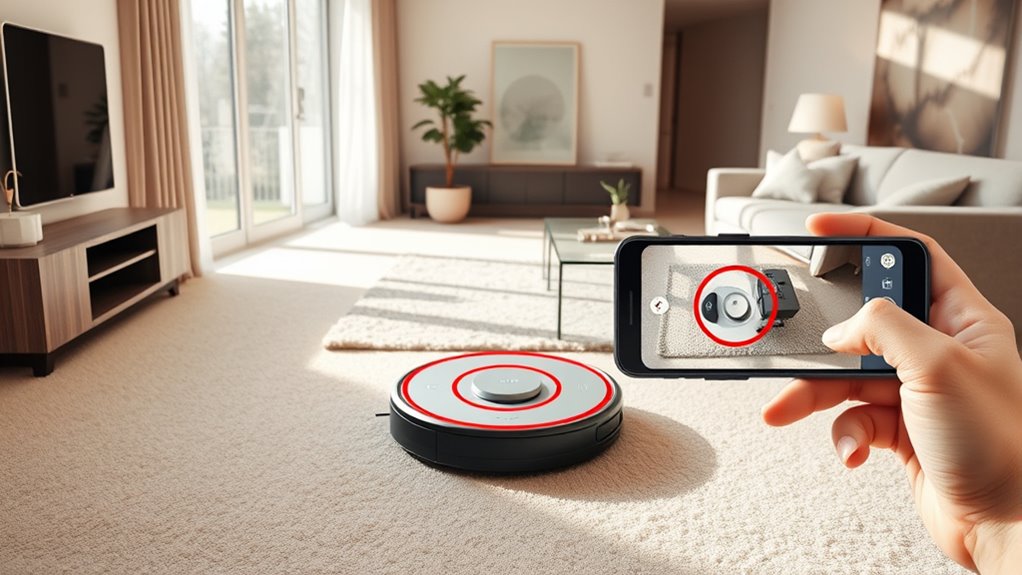
Accessing the Robot Vacuum’s Mobile App or Control Panel

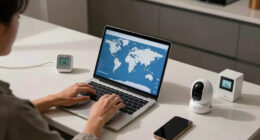
Accessing your robot vacuum’s mobile app or control panel is usually straightforward, but it’s essential to make certain your device is properly connected to Wi-Fi first. Once connected, open the app or use the control panel on your vacuum to access settings. From there, you can customize your cleaning schedule or adjust preferences. Make sure you have the necessary robot vacuum accessories, like the charging dock or boundary markers, ready for setup. The app often offers options to create virtual no-go zones, which you can define easily through the map view. Regularly updating the app ensures you have the latest features and bug fixes. Proper access to these controls enables you to manage your robot vacuum efficiently and set up your virtual zones with ease. Additionally, understanding home connectivity can help optimize your device’s performance and reliability.

roborock Q7 L5 Robot Vacuum and Mop Combo, 8,000Pa Suction, Upgraded from Q5 Pro, Dual Anti-Tangle System, LiDAR Navigation, Multi-Level Mapping, Self-Charging Robotic Vacuum Cleaner, Black
*Roborock robot vacuum supports only 2.4 GHz WiFi. Please ensure your router is set to this frequency. If…
As an affiliate, we earn on qualifying purchases.
As an affiliate, we earn on qualifying purchases.
Mapping Out Your Space for Zone Setup

Before setting up virtual no-go zones, you need to create an accurate map of your space. Your robot vacuum’s sensors and advanced mapping technology work together to scan your environment, capturing detailed layout data. To guarantee precise mapping, consider the following:
Creating an accurate map ensures your robot vacuum navigates and zones effectively.
- Clear clutter that may interfere with sensors during mapping
- Run the vacuum in a complete cleaning cycle for thorough data
- Identify and mark obstacles or areas needing protection
- Use the robot’s app to review the generated map for accuracy
- Adjust the map if necessary, correcting any misrepresented zones
Accurate mapping is essential for effective zone setup, enabling your robot to recognize boundaries and avoid restricted areas seamlessly. Properly leveraging your vacuum’s sensors and mapping technology makes zone configuration simple and reliable.
Creating Virtual Boundaries Using the App

To set virtual boundaries, you’ll need to navigate your app confidently and understand its features. Use clear boundary drawing techniques to mark no-go zones accurately. With some simple tips on app navigation and drawing, you’ll quickly create effective virtual limits for your robot vacuum. Knowing how to maximize space efficiency within your app can help ensure your virtual boundaries align perfectly with your living space. Additionally, understanding safe installation practices can prevent accidental boundary errors that might interfere with your robot’s operation. Being familiar with home layout and obstacle placement can further enhance the effectiveness of your virtual boundaries and improve your robot vacuum’s performance. Taking the time to familiarize yourself with the app settings can make boundary creation more precise and less frustrating.
App Navigation Tips
Using the app to create virtual boundaries allows you to customize your robot vacuum’s cleaning area easily. To navigate effectively, familiarize yourself with the app’s interface, ensuring smooth access to boundary settings. Use voice command features for quick adjustments or to activate no-go zones without opening the app. When manual mapping is available, verify the map for accuracy before setting boundaries. Remember, precise tapping and drag options help define zones accurately. Keep your app updated to access the latest features and improvements. Adjust zoom levels for detailed boundary placement, and use grid views for better precision. Lastly, explore the app’s tutorial or help section if you encounter navigation issues, ensuring you set boundaries confidently and efficiently.
Boundary Drawing Techniques
Creating virtual boundaries with your app involves precise drawing techniques to guarantee your robot vacuum cleans only where you want it to. Use your app’s boundary customization features to draw virtual lines or zones directly on your floor plan. Rely on your robot vacuum sensors to identify obstacles and ensure boundaries are accurate, especially around furniture or delicate areas. When drawing, be clear and steady, avoiding overlaps or gaps that could confuse the robot. Many apps let you adjust the shape and size of these boundaries for fine-tuned control. Proper boundary drawing ensures your vacuum respects no-go zones without accidental encroachments, giving you a customized cleaning experience that keeps sensitive or off-limits areas protected.
Adjusting and Editing No-Go Zones as Needed

Adjusting and editing no-go zones is a straightforward process that guarantees your robot vacuum stays out of undesired areas while maintaining cleaning efficiency. If you notice the vacuum entering restricted zones, you can modify the virtual boundary or update your zone editing settings. This flexibility allows you to refine no-go zones as your home layout changes or new obstacles appear. To do so, access your app’s map and select the zone you want to change. You can resize, move, or delete existing zones, ensuring they accurately reflect your needs. Proper zone editing helps prevent accidental entries and optimizes cleaning coverage.
- Adjust zone size for better coverage
- Move no-go zones for new furniture
- Delete outdated virtual boundaries
- Add new virtual boundaries easily
- Fine-tune zones based on cleaning patterns
Testing the No-Go Zones to Ensure Proper Functionality

Before relying on your no-go zones, it’s essential to verify them to make sure they work correctly. Start by activating zone customization in your app and running a test cleaning cycle. Observe if the robot respects the boundaries you set and avoids designated areas. Use app calibration tools if available to fine-tune the zone boundaries, ensuring they align accurately with your physical space. Pay attention to any discrepancies or areas where the robot ignores the no-go zones. Adjust the zone settings if needed and retest until the robot consistently avoids the restricted zones. Proper testing guarantees your no-go zones function as intended, giving you peace of mind that your robot vacuum will keep out of sensitive or off-limits areas during future cleanings.
Tips for Effective Zone Placement

To keep your robot vacuum working efficiently, focus on strategic zone placement where it’s needed most. Regularly adjust your zones as furniture or household layouts change to maintain ideal coverage. By staying proactive with these adjustments, you’ll ensure your vacuum avoids trouble spots and cleans thoroughly.
Strategic Zone Positioning
Strategic zone positioning is essential for maximizing your robot vacuum’s efficiency and ensuring it cleans areas effectively. By carefully placing no-go zones, you customize your cleaning routine to fit your home’s layout. This enhances zone cleaning, making sure high-traffic or delicate areas are avoided. To optimize zone placement, consider the following:
- Place no-go zones near fragile items or cords to prevent accidents
- Position zones around cluttered areas to improve cleaning efficiency
- Use zones to focus cleaning on frequently used spaces
- Adjust zones to protect pet areas or sensitive belongings
- Combine zone placement with mapping features for personalized cleaning routines
Proper zone positioning improves robot customization, allowing your vacuum to clean smarter, not harder. This strategic approach saves time and ensures thorough, targeted cleaning without unnecessary coverage.
Regular Zone Adjustment
Regularly adjusting your no-go zones guarantees your robot vacuum stays effective as your home’s layout or needs change. Over time, furniture shifts or new obstacles may require zone calibration to maintain efficiency. If you have a virtual pet that moves around or creates new clutter, updating your zones ensures your vacuum avoids those areas consistently. By periodically reviewing and modifying your no-go zones, you prevent missed spots and avoid unnecessary cleaning in restricted areas. Use your vacuum’s app to fine-tune zone boundaries, keeping them aligned with your current home environment. This ongoing adjustment helps your robot navigate smoothly and keeps your virtual pet safe from accidental disturbances. Regular zone calibration is key to maintaining ideal cleaning performance and adapting to your home’s evolving needs.
Troubleshooting Common Issues With Virtual Boundaries

Virtual boundaries are designed to keep your robot vacuum in check, but when they don’t work as intended, troubleshooting becomes necessary. Sometimes, issues stem from the robot vacuum sensors failing to detect the boundaries or virtual boundary limitations causing gaps in coverage. To fix problems, check if the sensors are clean and unobstructed. Ensure the virtual boundary lines are properly placed and clearly visible to the robot. Remember that reflective surfaces or dark carpets can interfere with sensor accuracy. Also, verify that the virtual boundaries aren’t too close to other electronic devices causing interference. If problems persist, reset the virtual boundaries and reprogram them. Understanding the robot vacuum sensors and virtual boundary limitations helps you address common issues efficiently.
Check sensor cleanliness and virtual boundary placement to prevent coverage gaps and sensor interference issues.
- Clean the robot vacuum sensors regularly
- Reposition virtual boundaries away from reflective surfaces
- Avoid placing boundaries near electronic interference sources
- Re-map zones after cleaning or moving furniture
- Update your robot vacuum’s firmware for flawless performance
Maintaining and Updating Your No-Go Zones Over Time

Over time, your no-go zones may need adjustments to stay effective as your home’s layout or furniture arrangements change. Regularly check your virtual boundary settings to guarantee they still cover the areas you want to restrict. If you notice the robot entering no-go zones or missing spots, it’s time for zone calibration. Adjust the virtual boundary lines using your vacuum’s app or control interface, refining the zone’s position and size as needed. Keep in mind that even small changes in furniture placement can impact zone accuracy. Periodic updates help maintain effective separation, preventing mishaps or missed cleaning spots. By staying proactive with zone calibration, you ensure your no-go zones remain reliable and your robot vacuum performs at its best in your evolving home environment.
Frequently Asked Questions
Can I Set No-Go Zones on Multiple Floors?
Yes, you can set no-go zones on multiple floors with multi-floor mapping. Your robot vacuum’s zone customization features typically allow you to create and manage virtual boundaries for each level. Just make certain your device supports multi-floor mapping, then switch between floors in the app to define no-go zones accordingly. This way, your vacuum cleans efficiently without entering restricted areas on any floor, ensuring thorough and customized cleaning across your entire home.
Are There Specific Area Size Limits for Zones?
Yes, there are area size limitations for zones, which vary by robot model. Typically, larger zones may be restricted or require zone customization to guarantee ideal cleaning. Check your vacuum’s specifications for exact size limits, as exceeding these can cause navigation issues. Proper zone customization helps you define effective no-go zones, ensuring your robot avoids sensitive or cluttered areas while maintaining thorough cleaning coverage.
Do Virtual Zones Affect the Vacuum’s Cleaning Pattern?
Imagine you set a virtual no-go zone around your rug’s edge. This flexibility allows you to block areas, which influences the vacuum’s cleaning pattern by avoiding certain spots. Virtual zones offer great flexibility, but they can alter how the robot navigates, potentially leading to less thorough coverage in restricted zones. So, yes, virtual zones impact the cleaning pattern, helping you customize your vacuum’s route to suit your needs.
Can I Temporarily Disable No-Go Zones?
Yes, you can temporarily disable no-go zones to give your robot vacuum more zone flexibility. Most models let you do this through their app, allowing you to turn off zone restrictions whenever needed. This feature offers convenient temporary disablement, so you can clean areas normally off-limits without permanently changing your zone setup. Just access your app’s settings and toggle the no-go zones back on when you’re done.
How Secure Is the Zone Data Stored in the App?
Your zone data’s security depends on the app’s encryption and permissions. Many apps encrypt zone information, making it difficult for hackers to access. Be cautious with app permissions—only grant what’s necessary, and avoid sharing login details. While companies aim to protect your data, always review privacy policies and verify the app uses strong zone encryption. Staying vigilant helps keep your virtual zones safe and secure.
Conclusion
By mastering the methodical setup of virtual no-go zones, you create a clean, clutter-free, controlled cleaning cosmos. Carefully calibrate your boundaries, troubleshoot technical twists, and tweak your zones regularly. This diligent dedication guarantees your device diligently avoids unwanted areas, delivering a seamless, sanitized space. With consistent care and clever configuration, you’ll cultivate a clutterless, carefree environment, confidently commanding your cleaner to clean precisely where you want—and avoiding where you don’t.